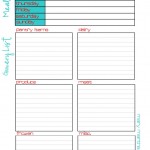
One Step Cupcakes

IMG_5164

Bringing kids into the kitchen can be a tough challenge.  Sometimes we don’t realize how many steps there are to a recipe until we start saying things like “No! You have to mix before you add the flour!” or things like “Please let me survive this.”

It happens.

My toddler loves to help in the kitchen.  He thinks that running my stand mixer is quite possibly the coolest thing ever.  Now that I let him add the ingredients himself he loves it even more.

It is worth every minute of the clean up afterward.

That said I do try to reduce the amount of steps.  He doesn’t quite get the whole “mix the butter and sugar then add the rest of the ingredients” thing.  So came one step cupcakes.

They are easy.  Throw it all in there, mix, and call it a day.  It is the perfect recipe for beginner cooks, because they won’t get overwhelmed by all of the steps.  Success with simple tasks is the foundation for teaching confidence.  Once they master this recipe they can move on to a normal cupcake recipe.

One Step Cupcakes with Buttercream Frosting

Ingredients:

for the cupcakes

  • 2 1/4 cups all-purpose flour
  • 1 1/2 cups sugar
  • 1 stick butter {1/2 cup}, softened
  • 1 1/4 cups whole milk
  • 1 tsp salt
  • 3 1/2 tsp baking powder
  • 1 1/4 tsp vanilla
  • 3 large eggs

for the frosting

  • 1 stick butter, softened
  • 1/2 tsp vanilla
  • 2 cups powdered sugar
  • 1 1/2 tbs whole milk
  • food coloring gel {optional}

1. Preheat the oven to 350 degrees.  Line a cupcake pan with wrappers. {This makes 24 cupcakes, so if you have 2 cupcake pans do both at once. If not, no biggie.  Just repeat for the second batch.}

2. In the bowl of a stand mixer, mix together all of the ingredients for the cupcakes.  Mix for 4-5 minutes on medium stopping every minute or so to scrape the sides.

3. Using a soup ladle, fill each cupcake liner about halfway with cupcake batter.  Cook in the oven for 30ish minutes.

4.  Once the cupcakes are cool, make the frosting.  In a stand mixer bowl, mix all of the ingredients together using the whisk attachment.  Run on medium-high speed for about 8 minutes or until very well-blended.  Add food coloring if you want.

5.  Let the kids decorate the cupcakes!

*****

Stephanie blogs about home cooking and toddler homeschooling at The Brunette Foodie.

Waiting in the Kitchen

kitchen3

We drive past a store “Sale” sign, and Esmé tells me, “If something you want to buy costs $20, and it is 50% off, then you only have to pay $10 for it!”

Yep, that’s my Daddy’s girl!  She’s got her shopping math down pat – and that’s all the math she really needs to know, hey?

Now that kitchen math stuff – doubling and halving recipes, figuring out serving sizes – that, we’ve been totally avoiding.  Primarily because I have a hard time cooking, let alone teaching, in a cluttered environment – and lately there are ALWAYS dirty dishes in the sink.

It seems everywhere I turn, I hear about the importance of “school” in the kitchen – how it builds motor skills, math skills, science skills, nutrition awareness, and even self-worth as your kiddo observes others eating her creations.  It all makes sense, I know.

We started out strong – my 10-month-old made great puffed-wheat-shredded-apple concoctions with her measuring cups, wooden spoons, and clanging metal bowl. 

At 15 months, she graduated to thumbprint cookies – though her favorite part was licking the jam spoon afterwards.

But now life has become overwhelming.  The clutter has taken over.  I can’t motivate myself to make cookies at all, let alone with a 4yo “helper” who is going to leave a floury white layer all over the counters, floor, and any clean dishes in the dish drain.

Lately, I’ve been in “wait mode.”  You know – where you “sit around” and wait on the Lord to deal with a bunch of distracting clutter in your life and show you the new direction He’s gonna take you next?  After all, He promises if you wait, you’ll soar like an eagle?

It’s, um, carried over into the kitchen.  It’s not that I’m waiting for God to tell me what to do with dirty dishes.  But I do want direction in prioritizing my time.  And my current kitchen is tiny, and I want to know how large my kitchen is going to be before I get rid of stuff, and I’ve got a dishwasher standing in the kitchen that isn’t hooked up yet, and…, and…

Guess what, though?  I’ve just figured out some Bible math:

Wait ≠ Freeze

All that clutter in the kitchen?  I can’t let it keep me from cooking meals for my family (though I admit it really has).  I need to keep walking.  Keep cooking.  Keep going.

Like Abraham, I need to obey and go, even though I don’t know where I’m going. (Hebrews 11:8)

And all the clutter in my life?  That’s simply a backdrop to showcase how great God is, what He can do.  It’s when you’ve been moving, when you’re weary, that God gives strength.  God will make the most marvelous recipe imaginable with the crazy ingredients of my life.

Not too mention some really amazing science with the clutter in the fridge.

Thumbprint cookies, here we come!

Jane writes about adventures, in the kitchen and elsewhere, with her 4yo at Mozi Esmé.

Teaching the Love of Baking

hsvjoy2

I have memories of when I was young, being in the kitchen with my dad or grandma baking and cooking.  Now that I have my own children, I have always tried doing the same thing with them.

There are plenty of ways that a child can help in the kitchen, even from a young age.  Begin with showing the children the different food items that can be found in the kitchen when you begin a recipe.  It is important to makesure you don’t get any of the ingredients mixed up, like sugar or salt!  Once you gather the ingredients for your recipe, you can move on to gathering the different tools that you will need for the recipe.  Since my daughter and I was making cookies, she helped me gather the measuring cups and spoons, the mixing bowl, spatula and baking sheets.

Even if they can’t read, I always show the kids the recipes that I am using.  I point out the words of the ingredients and show how much it is in the measuring cups or spoons.  Kids enjoy holding cups and pouring ingredients into measuring utensils and mixing bowls.

**Chocolate Chip Cookies
2 sticks butter (softened)
3/4 cup granulated sugar
3/4 cup brown sugar
2 eggs (room temperature)
1 tsp. vanilla
2 1/4 cups self-rising flour
2 cups semi-sweet chocolate chips (or you can use milk or dark chocolate)
1 cups chopped pecans – optional (or any other type of nut)
Preheat oven to 350.
Beat butter, granulated sugar, brown sugar and vanilla extract in large bowl, until creamy.  Add eggs, one at at time, beating well after each egg.  Beat in flour slowly.  Stir in chocolate chips and nuts.  Drop rounded tablespoon onto ungreased cookie sheets.
Bake 9-11 minutes or until golden brown.

Joy is the wife of one amazing husband and the mother of four wonderful children. Visit Joy at her blog to find out more about her life in the Great Smokies!

Let Your Children in the Kitchen

my then 4yr old browning meat

Do you allow your children into your kitchen?  Do you invite them in?  Do you give them the freedom to learn their way around a stove-top or oven?  Do you painstakingly encourage them to assist you even though it’s bound to make cooking take longer?

my then 4yr old browning meat

There was a time when I basically forbade my children dare enter mine kitchen.  I even had a terribly ungraceful catch-phrase that went a little something like this:

“Get out of my kitchen.”

That’s right, I tried to claim possession of the whole room.  It was mine.  And others shouldn’t mess with it.  It was my haven, my alone space, my thinking closet, and cooking was supposed to be my creative, relaxing activity.

Ironically, my kitchen never was relaxing because I was unnecessarily stressing myself out by forcing my children out of it constantly.  Because, let’s admit it, our fussing sometimes doesn’t add up to a hill of beans.  The children didn’t stay out at my insisting.  They still poked their heads back in every 3 minutes like clockwork.

 I finally had to accept the fact that I was being a bucket full of selfish.  I was being unloving, impatient, and severely lacking in grace.  So I gave in, took a deep breath, and … let the children into the kitchen.

Was our world transformed into Charlie and the Chocolate Factory, a land full of sunshine and laughter and magical wonder?  No.

But I did start connecting with my children better.  I did start passing onto them some life skills that they’ll indubitably need one day.  I did start cherishing the time that I’ve been given with them.

I also learned (relearned?)  that kids can do a lot more than we give them credit for sometimes.  After giving my daughter free reign to the kitchen (at around 10 years old) she began to teach herself quite a lot of things.  In fact, I think that it’s been good for her to have me be out of the kitchen.  It’s given her the freedom to learn without the nagging and nervousness that would probably accompany me looking over her shoulder.  She now cooks pancakes from scratch at least once a week for the whole family.

 I’m not suggesting that we let our children juggle butcher knives, and of course we should consider their age and maturity when deciding how much responsibility they’re ready for, but I would urge you to consider letting your children be more involved in your kitchen.  It’s an incredible space for learning.

And, after all, one day you really will have the kitchen all to yourself.  And you just might miss the interruptions.

Jessica Bowman has four children whom she occasionally, affectionately, refers to as “Wild Things”.  You can find her blogging at Bohemian Bowmans.

Eating Your Decorations: Asparagus Soup & Giveaway

1

There is a soup that I always associate with Christmas.

Asparagus soup.

Three bowls ready for three hungry boys.

It’s green.  It contains nutmeg.  We have eaten it on several occasions especially when our meals have contained five courses (note:  at my mother-in-law’s house).

But what I love about this soup . . . my kids devour it.  I think it has something to do with the amount of cream and salt.

Ezra is eating his soup by candle light; hence, the blurred photo!


Asparagus Soup

Ingredients

  • 1/4 cup butter
  • 1/4 cup chopped onion
  • 1/4 cup flour (I use arrowroot)
  • 2 cups chicken broth (I use chicken stock for better nourishment.)
  • 1 tsp ground nutmeg
  • Celtic Sea Salt
  • 2 Tbsp chicken bouillon granules (I omit since I use chicken stock, but my MIL still adds this.)
  • 2 cups half and half
  • 2 cups chopped fresh asparagus
Don’t be afraid of Junior Asparagus.  The woody part of the stalk breaks off quite easily.
It doesn’t really matter how you grab your asparagus, even your children can perform this slightly gratifying snap.  As I was holding the camera in one hand and snapping in the other, I placed the woody end of the stalk between my fingers and applied pressure, much like a lever (as seen on Sid the Science Guy).
When not balancing a camera while cooking, I typically break my asparagus stalk like a twig or branch to be used for firewood.
Directions
Make sure you have your apron strings tied tight for sauteing!
  • Melt butter in large pan.
  • Add onions; saute till transparent.
  • Stir in flour (or arrowroot); cook for 1 minute.
  • Blend in broth (stock), nutmeg, salt, chicken bouillon(optional).  Bring to a boil.
  • Add asparagus; reduce heat and simmer gently for 25 minutes.
  • Let cool a little, and puree in blender till smooth.
  • Return to pan and add milk and heat till hot.
This soup is dynamite with homemade croutons!
Ingredients: 
  • 1 stick butter, softened
  • 1 loaf densely textured bread (preferably sourdough)
  • 1/2 tsp salt
  • Dash of ground red pepper
  • 1/2 tsp paprika
  • 1/2 tsp savory
  • 1/2 tsp thyme
Directions
  • Beat butter till fluffy.
  • Add herbs.
  • Spread over bread slices.
  • Cut bread into small shapes, such as triangles, circles, diamonds or use small decorative cookie cutters.
  • Place on cookie sheet and bake in 225 oven for 1 to 1 1/2 hours till crisp and toasted.
Bon appetite!
P.S. Interested in the orange table decorations?  Read my tutorial over at the Homemakers Challenge.

Are you getting ready for a Christmas cookie exchange?  We’re excited to giveaway one (1) Amanda Bennett’s Download N Go – Crispy Cookies Unit Study (1st-4thgrade)!
 Simply leave a comment and share what you / your homeschoolers like to cook during the Christmas Season !

Review: Big Book of History

bigbookofhistory

** this giveaway is now closed. Jessica, Jessy, and Shirley won!

Understanding how the past has shaped our future will inspire young learners to make history for themselves! ~ Master Books

Educating Layton

Sometimes the idea of “History” can be overwhelming.  Especially curriculum that is text heavy and visually unappealing. What if you can fill all of history in one book – 15 feet long with vibrant pictures, interesting facts, and a color coordinated time line … who can resist that type of learning fun?!

Master Books has upped the bar and all publishing companies should consider producing such grand History books!

I received the Big Book of History and immediately my boys were unfolding the pages and reading the wonderful “did you know”? snippets.  This book is fantastic for my visual / tactile learner!

The Big Book of History time line is packed with 4 different tracks: Biblical/Christianity, World Events, Inventions/Technology, and Civilizations/Empires.  Information for every interest!

Did you know …

  • The flood caused the Ice Age? (read Case of The Missing Mountain for more research and fun!)
  • The largest stone at Stonehenge weighs 45 tons
  • The Trojan horse  only secretly held 30 soldiers and 2 spies
  • Slings were effective weapons flung a quarter of a mile at 60mph
  •  Olive oil was used for more than just cooking
  • There is only 1 “Ancient Wonder of the World” still standing
  • 1847 the 1st chocolate bar was created (thank you)
  • and so many other interesting facts your kids will love learning history!

The Big Book of History begins with Day 1 (an explanation of a literal 24-hour day) and ends with the last date of  2010 President Barack Obama.

15 feet of information between both entries makes this (light weight, easy to handle and read) Big Book of History a must have !

Keep up with Master Books on twitter and the monthly Teach the Truth twitter parties – the next party is Oct 25th, follow #teachthetruth for more information.

Stef blogs at Educating Layton.  ** this books was sent to me for free from Master Books and I offered to review the book at The Homeschool Village in exchange for 3 giveaway items.

Shh!! Healthy Candy on the Loose

DSC_0037

I gave Asher the cookbook and a stack of post-it-notes.  His task was to read the dessert titles to his brothers during snack time.  It sounded  like a good impromptu school activity to me.  I thought that they (being my three handsome boys ) surely would be able to agree on a “few” recipes while I nursed Naomi before her nap.  Not five minutes had passed before my growing baker came upstairs with a recipe book littered with neon pink sticky notes.  His goal was to find something yummy.  His brothers?  Content to let Asher do the cooking . . . and them the eating.

I felt like the story of  The Little Red Hen was being reenacted in my house in some ways.

Asher didn’t mind.  He likes to bake.  Afterall, that is what his name means.  He comes by it honestly.

But he wanted to make all the desserts that afternoon.   Sounds like me when I get on a fermenting kick.

My goal was threefold:

  1. create something healthy
  2. find a quick recipe that could be done together
  3. have the ingredients already in the pantry or at least be able to fudge them

We agreed on one very interesting treat.  I think my Asher gravitated towards it because of a recent kitchen disaster.

You see, we thought that if you used heat to make candy . . . then reheating it and combining a few sweet somethings should result in a new delight that would melt on your tongue.

No.  Not so.  Our concoction made us want to hurl.

So, my precious boy picked a title that implied candy.  I have yet to figure out how these frozen treats resemble candy, but I’m willing to allow my imagination to be stretched because this “candy” is loaded with protein, fiber, and chlorophyll (you know, the green stuff in plants that is high in iron).  The bonus is that it tastes good.


Healthy Candy

You will find the ingredients mixed with the directions for this particular recipe –

Grind the below ingredients in a blender.  (I wouldn’t do more than 1 cup at a time.  Unless you have a workhorse like a  Vitamix.)

  • 3 cups peanuts (or 2 1/4 cup of natural peanut butter.  I am sure you could substitute any other nut.)
  • 3/4 cup sunflower seeds
  • 1/3 cup pumpkin seeds
  • 1/3 cup flax seeds

In a seperate bowl, whisk butter and honey together until creamy.  Blend in the protein powder gently so it doesn’t billow up into your nose!

  • 1/2 cup of soft butter
  • 1 cup honey
  • 1 cup of protein powder


If you need to exercise your biceps and triceps, then evenly mix in ground nuts and seeds into the honey butter mixture.  I, however, took the faster approach and dumped the ingredients into my standing mixer.

Divide the mixture in half, so as to make two flavors of “candy.”

The texture of the dough seriously reminded me of this edible peanut butter play dough my mom used to make for me.  I know that back then I didn’t do much playing.  I ate most of what I made . . .

The two flavors I am recommending today?  Cinnamon and chocolate (of course).

Half of the dough will receive anywhere from 2-6 teaspoons of cinnamon.  I used 4 teaspoons and quite honestly would have enjoyed a stronger flavor.

The other bowl acquires my favorite ingredients, 1/2 teaspoon of vanilla and as much cocoa as you deem necessary.

Mold candy into fun shapes.  God bless your endeavors in this area.  I only succeeded in creating round balls.  This is where youthful hands would have been quite helpful; but they were in bed.  I had to finish our project by myself as we had interrupted our candy making for a birthday party.

Store your artfully shaped, hearty candies in the freezer and bring them out for a dense, protein packed, nutritious snack.

Pesto Outside Your Doorstep

basil

Basil.

Once used to anoint kings, this fragrant herb, especially when fresh, bestows a rich Italian bistro taste to any recipe.

Especially, pesto.

During the summer, I throw fresh basil into a variety of dinner meals.  But it is continually brought to our table in the form of pesto.

Pizza pesto. . .

Steamed vegetables and meatball pesto . . .

Or even pesto pasta on rare occasions.

So . . . if you have some basil growing in you garden, tell your kiddos to collect some leaves (about sixteen) and let’s get started with this quick recipe that involves counting!

Ingredients:

2 cups of fresh basil leaves, washed, and hopefully from your garden
2-4 garlic cloves, peeled*
1/4 toasted pine nuts
1/2 tsp sea salt
1/4 cup grated Parmesan cheese (great job for an older child)
1/2 cup (or less) olive oil

Directions:

You can make it difficult if you like.  You can gradually blend all of these ingredients together, feeling like a master chef as you do.

But I say . . . pulverize it!  Place all of your ingredients in a blender and crank up the power until you have created a slightly granular liquid.

Like I said earlier, serve over steamed vegetables, on whole wheat pizza, or as a dip for crackers.
To reheat, place in a pan and add a small amount of chicken stock.

*Have your child place a freshly peeled garlic bulb between their toes.  They should be able to taste the garlic in their mouth in a matter of seconds!

Please come by and visit me on the Granola Mom 4 God Facebook page, my blog, or on Twitter!  I’d love to hear from you!  You can find me blogging about a diverse range of topics from essential oils, to whole foods cooking, to homeschooling, to vacation reading, to square foot gardening!

Review: The Whole Family Cookbook

measuring

Teamwork makes everything taste better!

Our kitchen is the heart of our home and our homeschool. We’ve cooked up history with hasty pudding, while geography brought blueberry coffeecake. Math was all about doubling, quadrupling and halving a variety of recipes.  And literature? Well this fall will yield Ma Ingalls’ maple candy. The kitchen island… it’s where learning becomes real and bonds are tied like a fine bow upon Christmas gifts.
 
As a new school year begins we have a new springboard to tempt our palates and inspire discovery, one dish… one learning point… at a time. One of my favorite bloggers, teachers, authors, moms-extraordinaire… Michelle Stern, founder of What’s Cooking, recently released The Whole Family Cookbook. I was salivating at the title. We are a whole foods, whole books, whole-heart kind of family!
 

"Putting forth this kind of effort educating your children and cooking with them pays off in the most rewarding way as they become excited to try new foods and develop good eating habits that last a lifetime." ~ Michelle Stern, The Whole Family Cookbook

Cookbooks evoke about the same reaction from me as dark chocolate and red construction paper hearts. Each page turn of The Whole Family Cookbook elevated my enthusiasm for getting back to our culinary classroom!  I have whole foods cookbooks, a plethora of children’s cookbooks and an assortment of kitchen science curricula.  But Michelle’s labor of love is like no other.  What else did I expect from a mom/teacher/author/cook?!  Your whole family will appreciate:
  • Age-specific, color-coded preparation steps enabling each family member to know how they get to help at a glance! (And quickly allows the head cook to organize the troops!)  This is my favorite feature!
  • 2-3 page spreads for every recipe, making them easily readable.
  • Locavore-focused, organic food for health, sustainability and cost-efficiency.  (What’s a locavore? Trust me, you’ll want to be one! Read and find out!)
  • Useful and informative tips with every recipe, simple enough for elementary children to comprehend… meaty enough for the head cook to say, “Wow, I didn’t know that!”
  • An introduction for “Engaging Kids in the Kitchen” and Michelle’s “Recipe for Cooking with Toddlers”

Themed sidebars will spark learning among your family members with something for everyone:

  • “Kid Zone” ~ These brief, high-interest lessons cover things from how to easily get honey off your spoon to the Scoville scale!
  • “Going Green” ~ Being environmentally aware doesn’t have to involve Hurculean efforts.  Michelle, points the way.
  • “Recipe for Action” ~ Looking for kid-friendly community service ideas? I love this component!

So what kind of reviewer would I be if I didn’t give Michelle’s recipes a kid-test?! We started with the Baked Apple Puff… yum!  This dish is now our newest go-to brupper (breakfast for supper) option, reminiscent of a skillet-sized cinnamon-apple stuffed pop-over.  From my five-year-old connoiseur? “I can’t believe something so tasty came from so few ingredients.” (Seriously… did he just say that at the supper table?)

We also had fun with the Kid Zone idea on our recipe page, “Fruit or Vegetable”, a scavenger hunt to unplug kitchen appliances not in use.

And the precious gift of family bonding I mentioned earlier?  A little hand slipped about my waist as I whisked batter… accompanied by the softest, “I love you, Mommy”.  So what are you waiting for?  Lessons of the head and the heart are waiting for you in the kitchen!

 Leave us a comment below with your favorite learning moment in the kitchen! Friday we will select one comment to win a copy of Michelle’s The Whole Family Cookbook. In the meantime, watch Michelle’s video introduction, and sign up for her newsletter to receive her six best tips for cooking with kids.  Get to know Michelle and learn more about teaching your children in the kitchen on Twitter and Facebook.

One of Michelle's tips: Nest your mixing bowl in a larger bowl to catch spills and encourage independence.

Cutting up!


Little guy cracking eggs all by himself!

Code Purple! Leave the hot stuff to the big guys. Color-coded tasks make coordinating preparation a breeze!


Guest Post: Sweet Phenomena

Sweet Phenomena
Sweet Phenomena

Summer is here and since we as homeschoolers like to look for learning in everything, we might feel like we need to come up with something stellar for the summer. After all, we generally love learning and try to instill that in our children.

How can we have a bit of summer fun and still incorporate some hidden learning?

Cooking!

My daughter and I love to cook and bake. She’s eight and is already making dinner on her own one night each week.

The cooking I’m talking about, though, is not the run-of-the-mill, boring, needs-to-get done type of cooking. It’s the “Oh my goodness that looks so good-pretty-awesome-unusual!”, the stuff we sometimes forget about.


To get over that hurdle, why not try picking out a cookbook with your children and doing a summer cooking project? The local library likely has a nice assortment of kid’s cookbooks in the juvenile non-fiction juvenile section. You might even have several cookbooks at home that you can look through, or you might be able to swap with friends. Looking through the cookbooks can help you hone in on what you want to cook this summer.

Does your family want to work through all of the chocolate recipes in a certain book? What about international cuisine? Maybe you’ve decided that recipes incorporating your family’s favorite summer produce is the way to go. Learning a difficult cooking method is fun, too. The possibilities are virtually endless, and you can keep them as involved or as easy as possible.

There’s no need to spend a ton of time or money on this; you can easily find recipes that incorporate common ingredients and kitchen gadgetry. My daughter and I like to work with local ingredients during the summer, which means fun trips to the farmer’s market!

Once you’ve decided which recipes or cookbooks you want to work through, I find it best to put this information in my monthly planner. You might choose to label it something like “Cooking Day” or just list the recipe title. No matter how you do it, it allows you to schedule the time into your already hectic life!

So why should you spend time doing this with your kids?

First of all, it’s fun! Sure, it might be a bit messier than if you were doing it yourself, and it might take longer, but you’re building memories with your children that they’ll have with them forever. You could even make a scrapbook or cookbook keepsake for your kids by including pictures of the summer’s cooking antics and recipes in a book. This will be something they treasure for the rest of their life.

You’re also putting the skills they’ve learned all school year into action. When children cook, they can actually see how math applies to real life, build their reading skills, expand their vocabulary, and even learn about other cultures. It helped my daughter see how fractions, multiplication, and division were related.

You don’t need to be a master chef or have a ton of extra time on your hands. Your children will appreciate the time you’ve spent with them and you will have reinforced skills and built new ones as well.

Enjoy your summer and your scrumptious goodies!

Tiffany Manley is a super wife and homeschool mom, entering her third year of homeschooling her eight year old daughter.  She blogs about what it’s like to be a borne-of-necessity homeschooler and includes lots of sweet resources, links, curriculum information, ideas, and all-around awesomeness on her blog.  She likes food, the color pink, cakes and cupcakes, and using the words “sweet” and “awesome” quite a bit.
Sweet Phenomena